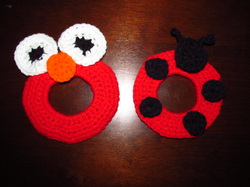
So here's my first attempt at writing a crochet pattern. I don't know how many people will even look at this or if any of them crochet but oh well!
My friend Theresa is a photographer (check out her page, Theresa Lucin Photography). She was wondering if I could make a couple lens buddies for when she photographs children. They looked simple enough, so I did some searching for the basic patterns. These are very simple and the options for being creative are endless!
I started with red yarn following this pattern that involves crocheting around a hair tie:
http://4hankins.blogspot.ca/2012/10/kitty-camera-buddy-free-pattern.html
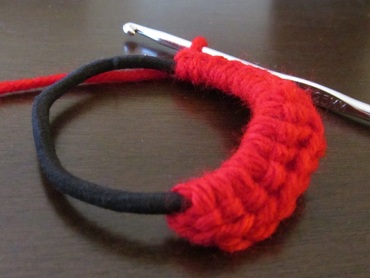
I stopped before she started making the ears, and this is when I did some experimenting of my own.
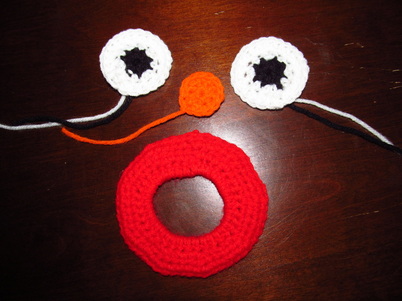
Elmo Pattern
Abbreviations:
ch - chain
sl st- slip stitch
hdc - half double crochet
I started the eyes and nose with a magic ring. Good instructions for that are found HERE.
Eyes (make 2)
Start with black yarn
Round 1: Magic ring, 8 hdc in magic ring, sl st to join
Switch to white yarn, ch 2
Round 2: hdc in first hdc, 2 hdc in next, repeat around, sl st to join, ch 2
Round 3: 2 hdc in each hdc, sl st to join, fasten off, leaving a long tail to sew eyes on
Nose
Round 1: Magic ring, 8 hdc in magic ring, sl st to join, ch 2
Round 2: hdc in first hdc, 2 hdc in next, repeat around, sl st to join, fasten off leaving a long tail to sew nose on.
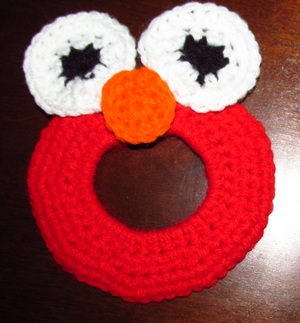
Sew on eyes and nose, and you have your elmo lens buddy!
Lady Bug Pattern
Abbreviations:
ch - chain
sl st- slip stitch
sc - single crochet
hdc - half double crochet
I started the head and spots with a magic ring. Good instructions for that are found HERE.
Head:
Round 1: Magic ring, 8 hdc in magic ring, join with sl st, ch 2
Round 2: hdc in first hdc, 2 hdc in next, repeat around, sl st to join, do not fasten off, begin antenna
Antenna 1:
ch 5, sc in 2nd ch from hook, fasten off, weaving in the end through the chain to give it some support
Antenna 2:
Attach yarn so there are 2 stitches in between antennae/antennas (dictionary says both are correct)
ch 5, sc in 2nd ch from hook, fasten off, weaving in the end through the chain to give it some support
Spots (make 4):
Magic ring, 8 hdc in magic ring, join with sl st, fasten off leaving a long tail to sew on.

 RSS Feed